


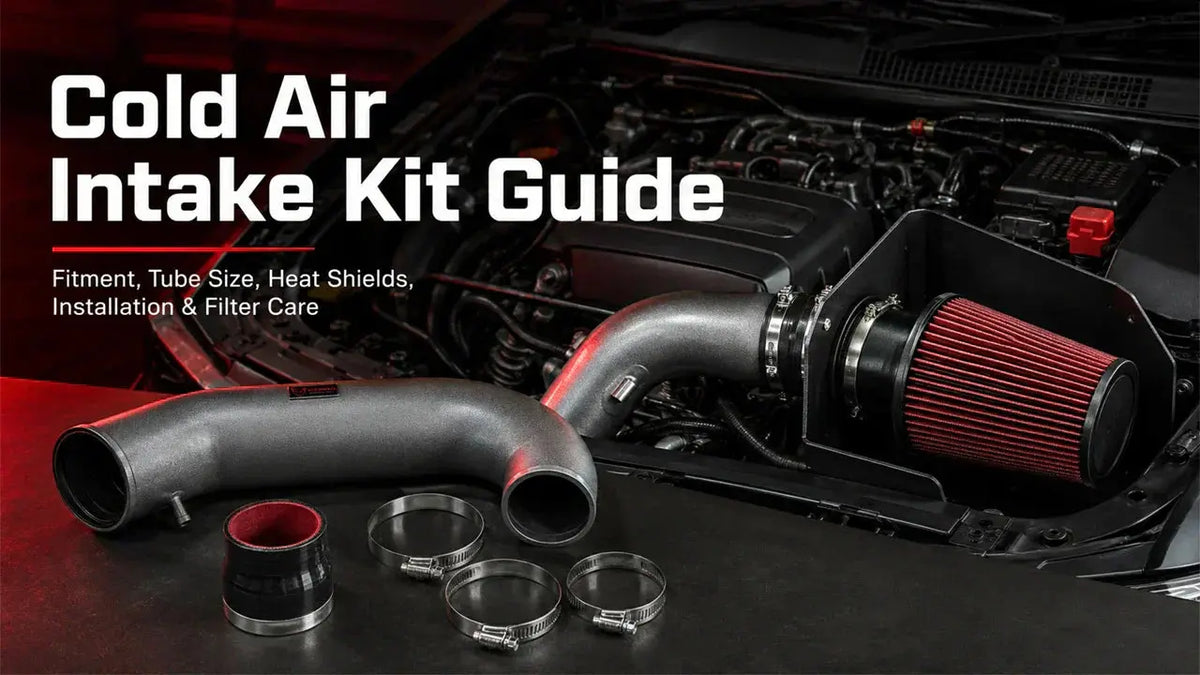
A cold air intake kit should be chosen by exact vehicle fitment, engine layout, sensor position, tube routing, filter location, and included hardware. Do not choose an intake by tube diameter alone. From a repair and installation standpoint, the most common problems after installation are not caused by the filter itself. They are usually caused by a loose coupler, incorrect MAF sensor orientation, missing breather connection, poor clamp seating, heat exposure, rubbing, or a kit that does not match the vehicle calibration.
This guide explains how to check cold air intake fitment, compare intake tube size, understand heat shields, install the kit more safely, diagnose rough idle or check-engine lights after installation, and maintain a reusable intake filter.
Direct Answer
Choose a cold air intake kit by matching the exact year, make, model, engine, sensor layout, throttle-body inlet, breather ports, tube routing, filter location, and mounting hardware. A proper installation should keep the MAF sensor and breather connections in the correct position, seal every coupler, avoid heat and water hazards, and leave enough clearance from the hood, fan, belts, radiator, wiring, and sharp edges. Reusable intake filters should be cleaned and serviced only according to the filter manufacturer's instructions.
Key Takeaways
- Exact vehicle and engine fitment matters more than choosing a 3-inch or 4-inch intake tube.
- A larger intake tube is not automatically better if it disrupts airflow velocity, sensor readings, packaging, or calibration.
- The MAF sensor direction, sensor seal, breather hose, PCV connection, couplers, and clamps must be installed correctly.
- An intake heat shield can reduce direct engine-bay heat exposure, but it does not guarantee ambient air temperature.
- After installation, inspect for air leaks, rubbing, warning lights, abnormal idle, and loose hardware before assuming the part is defective.
- Over-oiling a reusable intake filter can contaminate sensitive airflow sensors on some vehicles.
What Does a Cold Air Intake Kit Replace?
A typical cold air intake kit replaces the factory air box, factory filter, and part of the factory inlet duct before the throttle body. Depending on the application, a kit may include an intake tube, reusable filter, intake heat shield, couplers, clamps, brackets, grommets, sensor mounts, breather fittings, hardware, and installation instructions.
On many vehicles, the cold air intake is only one part of the full intake path. Air still moves through the throttle body, intake manifold, cylinder-head ports, and valves before entering the cylinders. For a full system explanation, read the car air intake system components guide.
Before Buying: What a Mechanic Checks First
Before replacing the factory intake, inspect the existing system. A dirty filter, loose clamp, cracked air intake hose, split coupler, disconnected breather hose, sensor seal leak, throttle-body deposit, or vacuum leak can make the vehicle feel weak even when the intake design is not the real restriction.
Use this pre-purchase checklist:
| Check Point | Why It Matters | Common Mistake |
|---|---|---|
| Current filter condition | A clogged or damaged filter can reduce response and create restriction. | Buying a performance intake before fixing basic maintenance issues. |
| Air intake hose and ducting | Cracks, soft spots, or loose joints can cause unmetered air or poor sealing. | Ignoring a split factory hose and blaming the new intake later. |
| MAF or MAP sensor condition | The engine computer depends on correct airflow or pressure data. | Installing the MAF backward, rotated, or with a poor seal. |
| PCV and breather routing | Missing or open breather connections can cause idle and fuel-trim problems. | Leaving a port uncapped or a hose disconnected. |
| Throttle-body cleanliness | Carbon deposits can cause idle problems that appear after intake work. | Assuming the new intake caused every idle issue. |
| Diagnostic trouble codes | Existing lean codes, sensor codes, or misfire codes should be known before installation. | Not scanning the vehicle before changing parts. |
If you are deciding whether the air filter, cold air intake, throttle body, intake manifold, or cylinder heads should be upgraded first, use the intake upgrade priority guide before buying parts.

How to Verify Cold Air Intake Kit Fitment

Fitment should be verified before installation. A cold air intake kit that looks similar online may still fail to fit because of sensor location, tube angle, bracket position, emissions equipment, hood clearance, or engine-bay packaging.
| Fitment Check | What to Confirm | Why It Matters |
|---|---|---|
| Year, make, model, and trim | Confirm the exact vehicle application listed by the product. | Body structure and engine-bay space can change by year or trim. |
| Engine displacement and engine code | Match the listed engine size and engine family. | Throttle inlet, sensor layout, and breather routing can differ. |
| MAF or MAP sensor configuration | Check sensor mount shape, direction, connector, and housing style. | Incorrect sensor placement can affect idle, fuel trims, and drivability. |
| Throttle-body inlet size | Confirm that the coupler matches the throttle-body opening. | A stretched or loose coupler can leak, slip, or collapse. |
| PCV and breather ports | Match all required hose connections and fittings. | Open or missing connections can create vacuum leaks or crankcase ventilation problems. |
| Heat shield and filter location | Check how the filter is separated from direct engine-bay heat. | Poor placement can expose the filter to heat, debris, or water. |
| Battery, radiator, fan, and hood clearance | Confirm space around all moving and hot parts. | Rubbing, vibration, and heat damage can appear after driving. |
| Emissions equipment | Do not remove required sensors, hoses, or emissions components. | Missing equipment can cause warning lights or legal compliance problems. |
For LS-based intake planning, port shape and downstream parts also matter. If the project includes manifold changes, review LS cathedral-port and rectangular-port intake compatibility before assuming parts will interchange.
Is a 4-Inch Cold Air Intake Better Than a 3-Inch Intake?
Not automatically. A 4-inch intake tube has more cross-sectional area than a 3-inch tube, but airflow performance depends on the complete system, not only tube diameter. Filter area, bends, tube length, coupler transitions, MAF housing size, throttle-body opening, manifold design, engine displacement, RPM range, and calibration all matter.
A larger tube may help an engine that actually needs more airflow, but it can also create problems when poorly matched. On a MAF-equipped vehicle, changing the housing size or airflow pattern can affect the signal the engine computer expects. On some combinations, an oversized tube may reduce low-speed air velocity or create packaging issues without improving real performance.
| Tube Size Question | Better Way to Think About It |
|---|---|
| Is 4-inch always better than 3-inch? | No. The correct size depends on engine airflow demand, sensor strategy, routing, and calibration. |
| Can a larger intake tube cause problems? | Yes. Poor MAF behavior, weak sealing, low-speed response changes, and clearance problems are possible. |
| Should I choose the biggest tube available? | No. Choose the kit validated for your exact vehicle or design the system as a complete calibrated package. |
| What matters besides diameter? | Filter size, bend quality, transition smoothness, sensor position, heat control, and downstream restrictions. |
If the build includes a throttle-body change, do not size the intake tube in isolation. Read the throttle body fitment and sizing guide to understand bore size, DBW versus cable control, connector differences, and LS fitment concerns.
What Does an Intake Heat Shield Actually Do?
An intake heat shield helps separate the filter from direct radiant heat and hot engine-bay air. It can also help guide incoming air from a factory inlet area when the shield seals well against the surrounding body structure. However, an intake heat shield does not make every intake charge cold, and it cannot fix a filter placed next to exhaust heat, a missing seal, or poor engine-bay airflow.
Heat-shield effectiveness depends on:
- How well the shield seals against the body, hood, or factory inlet area.
- Whether the filter is protected from radiator, exhaust, and engine heat.
- Vehicle speed and underhood airflow.
- Ambient temperature and traffic conditions.
- Filter location and distance from splash or water exposure.
From a service perspective, the heat shield should be mounted securely without rattling, cutting hoses, pressing into wiring, or interfering with the hood.
Cold Air Intake Kit Installation: Mechanic-Style Process
Always follow the exact product instructions for the kit and vehicle. The steps below are a general installation workflow that helps prevent the most common cold air intake problems.
1. Prepare the vehicle
- Park on a stable surface and let the engine cool.
- Disconnect the battery if the product instructions or vehicle service procedure require it.
- Take photos of the factory air box, intake tube, sensor location, hose routing, clamp positions, and bracket locations.
- Scan for existing diagnostic trouble codes if the vehicle already has drivability issues.
2. Remove the factory intake carefully
- Loosen clamps without damaging the throttle-body inlet or sensor housing.
- Unplug sensors by releasing the connector lock instead of pulling on wiring.
- Remove breather and PCV hoses without cracking brittle plastic fittings.
- Keep factory hardware organized in case a bracket, grommet, or fastener must be reused.
3. Transfer sensors and fittings correctly
- Install the MAF sensor in the correct direction and clocking position.
- Use the required gasket, O-ring, or grommet so the sensor seals properly.
- Do not touch or contaminate sensitive sensor elements.
- Install breather fittings and plugs exactly as required for the vehicle.
4. Test-fit the intake tube, heat shield, and filter
- Loosely assemble the intake tube, couplers, clamps, brackets, and heat shield before final tightening.
- Check clearance around the hood, fan, belts, radiator, wiring, brake lines, A/C lines, and sharp edges.
- Make sure the filter is not forced against the body, headlight housing, heat shield, or hood insulation.
- Confirm that the tube does not pull sideways on the throttle body or sensor housing.
5. Seat couplers and clamps properly
- Push each coupler fully over the tube and throttle-body inlet.
- Place clamps squarely behind the bead or raised lip when the tube design has one.
- Tighten clamps evenly without crushing the tube or cutting into the coupler.
- Recheck every joint downstream of the MAF sensor because leaks in this area can affect fuel trims and idle quality.
6. Reconnect hoses and wiring
- Reconnect all PCV, crankcase breather, vacuum, and sensor connections.
- Make sure harnesses are clipped away from hot, sharp, or moving parts.
- Cap only the ports that the instructions specifically tell you to cap.
- Never bypass required emissions or crankcase ventilation equipment.
7. Start and inspect
- Start the engine and listen for hissing, rattling, rubbing, or unstable idle.
- Check for a check-engine light or stored diagnostic trouble codes.
- Blip the throttle lightly and watch for excessive tube movement.
- After a short drive, recheck clamp tightness, filter position, bracket hardware, and clearance marks.
Post-Installation Checklist
| Inspection Area | What Good Looks Like | Problem Sign |
|---|---|---|
| Idle quality | Stable idle similar to the pre-install baseline. | Surging, stalling, hunting, or rough idle. |
| MAF sensor | Correct direction, sealed mount, secure connector. | Lean code, airflow code, hesitation, or poor response. |
| Couplers and clamps | Fully seated, evenly tightened, no gaps. | Hissing noise, slipping tube, unmetered-air leak. |
| Breather and PCV hoses | All required hoses connected and secure. | Open fitting, oil smell, idle issue, vacuum leak. |
| Filter position | Secure, clear of hot and moving parts. | Rubbing, crushed filter, loose filter, water exposure. |
| Heat shield | Firmly mounted with no rattles or sharp contact. | Vibration noise, cut hose, scratched tube, hood contact. |
What Causes Rough Idle or a Check-Engine Light After Installing a Cold Air Intake?
If the engine idles poorly after installing a cold air intake kit, inspect the installation before replacing more parts. The intake may be installed incorrectly, or an old issue may have been disturbed during removal.
- MAF sensor installed backward: The airflow direction must match the sensor and tube design.
- MAF sensor rotated incorrectly: Some sensors are sensitive to clocking and airflow profile.
- Loose coupler after the MAF: Air entering after the MAF is not measured correctly.
- Disconnected PCV or breather hose: An open hose or port can create a vacuum leak or crankcase ventilation issue.
- Damaged sensor seal: A missing O-ring, pinched gasket, or cracked grommet can leak air.
- Wrong tube or sensor housing: A MAF housing that does not match calibration can cause fuel-trim problems.
- Over-oiled filter: Excess oil can contaminate sensitive airflow sensors on some vehicles.
- Wiring pulled or connector not locked: Sensor connectors should click into place and be routed safely.
- Existing maintenance issue: Dirty throttle body, old vacuum leak, weak ignition parts, or existing codes may become more noticeable.
Use a scan tool to retrieve diagnostic trouble codes and check the work in a logical order. Do not diagnose the problem by intake sound alone.

Cold Air Intake vs Air Filter Replacement
If the factory air box and ducting are in good condition, replacing the engine air filter may be the correct first step. A cold air intake kit is more appropriate when the owner wants a vehicle-specific intake layout, reusable filter serviceability, improved engine-bay appearance, or a changed induction sound, and when the kit is designed for the exact application.
| Option | Best For | Watch Out For |
|---|---|---|
| Replacement air filter | Routine maintenance, stock air box, simple service. | Wrong filter size, poor sealing, dirty air box, damaged clips. |
| Reusable intake filter | Owners who want serviceable filter media and repeated maintenance. | Incorrect cleaning, incomplete drying, over-oiling, sensor contamination. |
| Cold air intake kit | Vehicle-specific intake tube, filter, heat shield, and hardware replacement. | Fitment mismatch, MAF errors, coupler leaks, clearance issues, water exposure. |
For filter media and replacement questions, see the engine air filter types, fitment, and replacement guide.
Cold Air Intake and Downstream Engine Matching
A cold air intake kit is upstream of the throttle body. On a stock or lightly modified vehicle, the intake kit may be the most visible airflow change. On a more serious engine build, the intake tube and filter should be matched with the throttle body, intake manifold, cylinder heads, camshaft, exhaust, and fuel system.
For EFI and carbureted combinations, manifold runner length, plenum volume, port match, throttle-body size, and RPM range can change how the engine responds. If you are building a complete intake combination, review the intake manifold runner, plenum, EFI, and carb guide.
If the project includes cylinder-head changes, runner volume, chamber size, valve size, spring package, compression, and piston-to-valve clearance also matter. For more detail, read the LS, SBC, and BBC cylinder head runner and chamber size guide.
For a complete engine combination, use the cylinder heads, intake manifold, throttle body, and cam matching guide.
How to Care for a Reusable Intake Filter
Reusable intake filters should be maintained according to the exact filter manufacturer's instructions. Do not assume every reusable filter uses the same cleaning method, oil amount, drying time, or service interval.
- Inspect the filter for dirt loading, torn media, damaged pleats, loose end caps, or poor sealing.
- Remove the filter carefully so dirt does not fall into the intake tube.
- Clean only with the approved cleaner for that filter type.
- Allow the filter to dry fully before reinstalling.
- Apply oil only if the filter design requires oil.
- Do not over-oil the filter, especially on MAF-equipped vehicles.
- Reinstall the filter fully on the tube and tighten the clamp evenly.
- Inspect the intake tube for dust trails, which can indicate a sealing problem.
Paper filters are usually replaced rather than washed. Keep paper-filter claims separate from reusable intake-filter claims.
When Not to Install a Cold Air Intake Kit
A cold air intake kit may not be the right repair if the vehicle has unresolved diagnostic codes, a failing MAF sensor, a known vacuum leak, damaged wiring, an emissions inspection concern, or an engine combination that requires custom tuning. It is also not a solution for misfires, low fuel pressure, ignition faults, exhaust restrictions, or mechanical engine problems.
Do not install a universal intake tube when the vehicle requires a calibrated MAF housing unless you are prepared to verify data and tune the system correctly. Do not place the filter where it can easily ingest water, road splash, or hot exhaust air.
Who Is This Guide For?
This guide is for DIY vehicle owners, truck owners, Jeep owners, street-performance drivers, and project builders who want to select and install a verified vehicle-specific cold air intake kit with fewer fitment and drivability problems.
Frequently Asked Questions
Q: Will a cold air intake fit any car with the same tube diameter?
A: No. Tube diameter alone does not determine fitment. Sensor housing, MAF orientation, throttle-body inlet size, breather ports, brackets, heat shield shape, filter location, hood clearance, and calibration can all differ.
Q: Does every cold air intake need a tune?
A: No. Some vehicle-specific cold air intake kits are designed to work without a tune, while other intake designs or modified engine combinations may require calibration. Follow the exact kit instructions and monitor vehicle data after installation.
Q: Can a cold air intake cause a check engine light?
A: Yes, especially if the MAF sensor is installed incorrectly, a coupler leaks after the MAF, a breather hose is disconnected, a sensor seal is damaged, or the MAF housing does not match what the vehicle calibration expects.
Q: Can a heat shield prevent all heat soak?
A: No. A heat shield can reduce direct heat exposure, but intake temperature still depends on filter location, sealing, underhood airflow, vehicle speed, traffic conditions, and ambient temperature.
Q: Why is my engine idling poorly after installing a cold air intake?
A: Check the couplers, clamps, MAF direction, sensor seal, breather hoses, vacuum ports, and wiring first. Scan the vehicle for diagnostic trouble codes before replacing unrelated parts.
Q: Is a 4-inch intake always better than a 3-inch intake?
A: No. A larger tube can help only when the engine combination can use the extra airflow and the sensor housing, routing, and calibration are correct. A well-matched 3-inch intake can perform better than a poorly matched 4-inch intake.
Q: How often should I clean a reusable intake filter?
A: Use the exact filter manufacturer's inspection and service guidance. Dust exposure, off-road use, mileage, climate, and driving conditions can change the service interval.
Q: Can I wash a paper air filter?
A: Usually no. Most paper air filters are replaced rather than washed. Reusable cotton or synthetic filters require their own specific cleaning instructions.
Q: What should I check after the first drive?
A: Recheck clamp tightness, filter position, heat shield hardware, tube clearance, hose routing, sensor connectors, and any signs of rubbing. Also check for warning lights, unstable idle, abnormal noise, or air leaks.
Related EVIL ENERGY Intake Guides
- What intake upgrade should you do first?
- Car air intake system components explained
- Engine air filter types, fitment, and replacement
- Throttle body DBW, cable, size, and LS fitment guide
- Intake manifold runners, plenum, EFI, and carb guide
- LS intake compatibility: cathedral ports vs rectangular ports
- Cylinder head runner and chamber size guide
- How to match cylinder heads, intake manifold, throttle body, and cam


