Close


EVILENERGY | Celebrate the Game, Upgrade Your Build!

Show Your Ride, support Your Team!

Featured Products
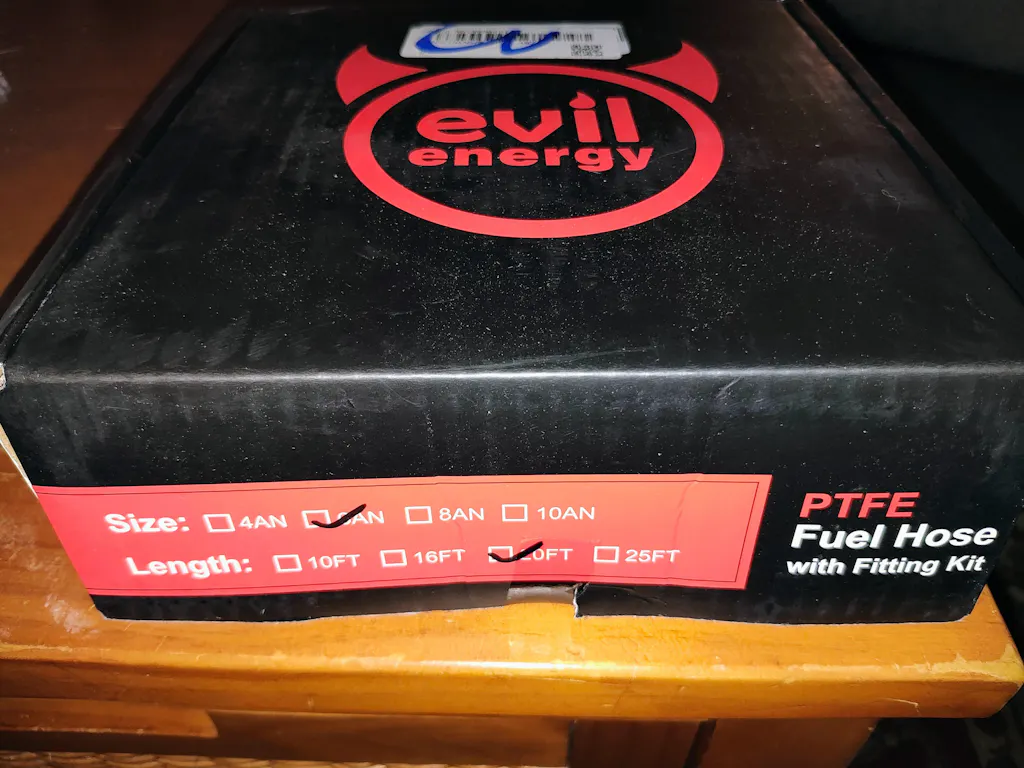
![[20FT] EVIL ENERGY PTFE Fuel Line Kit, complete black hose & fittings set, 180-day return](http://www.ievilenergy.com/cdn/shop/files/Test-2025-Evilenergy-125598065_940x.png?v=1742144807)
![[16FT] EVIL ENERGY PTFE Fuel Line Kit, black braided hose, fittings, free shipping & return](http://www.ievilenergy.com/cdn/shop/files/Test-2025-Evilenergy-125598171_940x.png?v=1742144807)
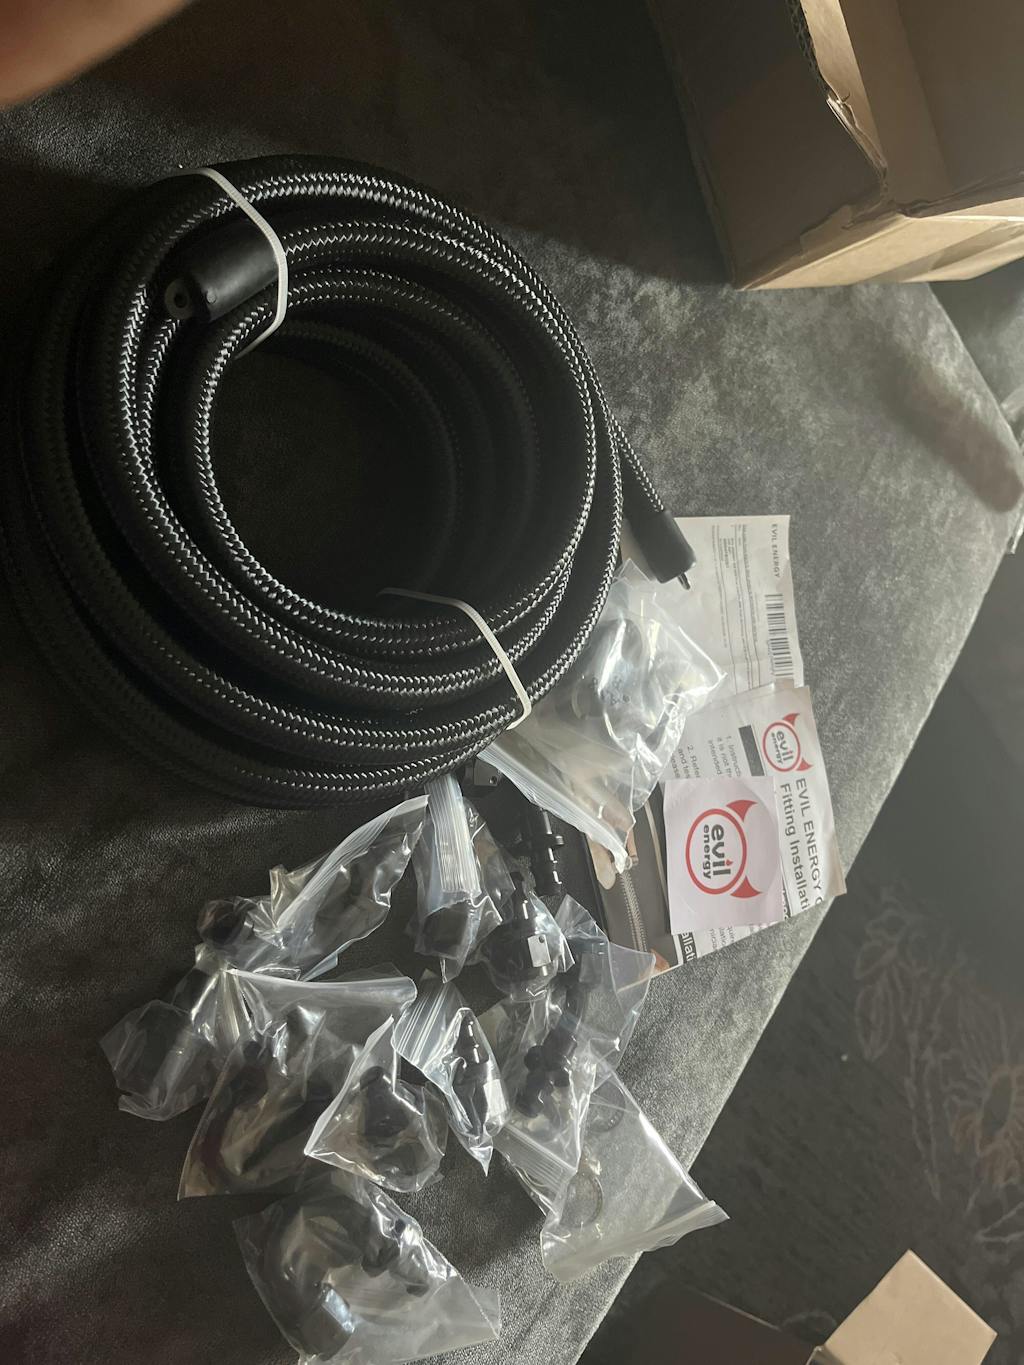
EVIL ENERGY 4/6/8/10AN PTFE Fuel Line Kit | E85 Nylon Braided Hose | 16/20FT Black Black with Comprehensive Fittings
- $62.09
- $62.09
$70.99- Unit price
- per
![CPE Fuel Line[25FT]](http://www.ievilenergy.com/cdn/shop/files/25FTCPE_FuelLine_940x.png?v=1735220649)
![CPE Fuel Line[20FT]](http://www.ievilenergy.com/cdn/shop/files/20FTCPE_FuelLine_940x.png?v=1735220649)
EVIL ENERGY 4/6/8/10AN CPE Fuel Line Kit Black Nylon Braided Fuel Hose Fitting Kit 20FT/25FT
- $65.99
- $65.99
$76.89- Unit price
- per
About Author

HuongCong Minh
How to Restore a Muscle Car: The Complete Step-by-Step Guide

🎁 A Personal Gift For My Readers
To support your project, I've secured an exclusive 8% OFF for you.
Simply paste the code at checkout.
💡 Use the savings to grab your extra fittings, oil lines, or connectors for free!
Your Promo Code
Blogs8
Tap to copy & save
🛡️ Official Reader Discount
🔧 Save on Fittings/Hoses
🔒 Secure Checkout
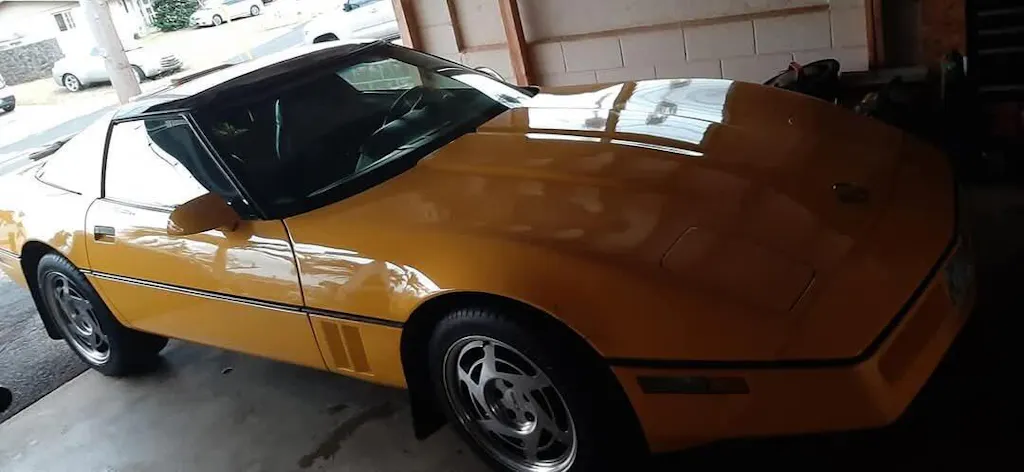
We all love a comeback story. There is something about pulling a muscle car back from the dead in your own garage — engine cranks, a V8 that has been sitting silent for years, tears back to life, your hands wrap around a freshly restored wheel, and that Camaro, Chevelle, or GTO is breathing again. This is what drives us. In this guide, we walk through the complete ten-step process: from budgeting and engine rebuilding to full paint and final tuning, so your classic muscle car comes back the right way — ready for the track, ready for the show floor.

Step 1 – Plan Your Restoration: Assess Skills, Goals & Budget
Before you touch a single bolt, plan. This step feels dry, but every decision you make throughout the entire restore of a muscle car project flows from how well you plan it upfront.
Define Your Goal
Muscle car restoration does not mean the same thing to everyone. You need to figure out which type of project you are actually building before you do anything else.
Factory-Correct Restoration means returning the car to its original as-delivered condition — OEM parts, correct paint codes, period-accurate interior materials. This category commands the highest premiums in the collector market, but the demands on parts sourcing and workmanship are unforgiving.
Restomod takes a different path. You keep the classic body and styling while dropping in modern mechanical systems — think a vintage Chevelle shell riding on a modern LS engine, disc brakes, and an EFI fuel system. Daily driveability is far better, and this segment is growing the fastest right now. Future Market Insights' 2025 report projects Restomod builds will lead all service types by 2026, capturing 39.5% market share.
Show Car builds push visual perfection above everything else. Details can go beyond factory spec. This is the SEMA-level custom territory.
Honestly Assess Your Skill Level
Take a hard look at what you can actually do. Sheet metal welding, engine rebuilding, and electrical system work all carry real learning curves. Tasks most people can DIY include disassembly, parts organization, body sanding, and interior swaps. Work that typically belongs in a professional shop: machine work like cylinder boring, professional paint application, and frame straightening.
Set a Budget for Muscle Car Restoration
This is where most people see the numbers and take a step back. Based on what we have seen across real DIY builds, here is a realistic cost breakdown for a full muscle car restoration:
|
Work Item |
Cost Range |
|
Disassembly and documentation |
$2,000 – $2,500 |
|
Media blasting / rust removal |
$1,500 – $3,000 |
|
Body and sheet metal repair |
$3,000 – $10,000+ |
|
Professional paint |
$2,000 – $20,000 |
|
Engine rebuild |
$3,000 – $8,000 |
|
Fuel system upgrade |
$500 – $3,000 |
|
Interior restoration |
$5,000 – $15,000 |
|
Professional labor (per hour) |
$50 – $150 |
|
Total project estimate |
$20,000 – $50,000+ |
Build in at least 25% on top of whatever total you land on. No experienced restorer will tell you their project came in under budget. Rust that runs deeper than expected, parts that go out of stock, machine work that needs to be redone — these are not edge cases. They are the rule.
Choose Your Restoration Method: Frame-Off vs. Body-On
Frame-Off is the most thorough approach. The body comes completely off the chassis, which lets you address every inch of the frame. It is the only path to true show-quality results, but it costs more and takes longer. Body-On works well when the structure is already in solid shape. Labor costs drop significantly, and you can still do a full mechanical rebuild without pulling the body.
Step 2 – Finding and Buying the Right Project Car
Pick the right starting point and you eliminate half your problems before you even start wrenching.
Research the Model and Parts Availability
According to U.S. Census Bureau data, there are currently 890,000 classic vehicles in the U.S. waiting to be restored — but not every model gives you the same experience.
Ford Mustang, Chevrolet Camaro, and Chevelle are among the best-supported muscle cars in the aftermarket. From glass seals to engine blocks, Classic Industries and online auction platforms carry comprehensive coverage for these platforms. Rarer models like the Plymouth 'Cuda or Dodge Hemi Charger are a different story. Original parts are increasingly hard to find, and prices can run several times higher than standard variants. If you are new to this, those models deserve serious caution.
Before you commit to any car, getting involved with local owner clubs and online forums is one of the most practical moves you can make. Every model has its own list of known issues, and learning from people who have already paid for those lessons can save you thousands.
Inspect for Rust and Structural Damage
Rust is the biggest hidden cost in any classic muscle car purchase, and it is the hardest thing to price accurately upfront. Before buying, focus on these areas: chassis frame rails, floor pans, inner and outer wheel wells, rocker panels, and the trunk floor. If you can, spend around $100 to have a knowledgeable tech do a pre-purchase inspection. That money almost always pays for itself.
Take detailed photos of everything, especially underneath. Those images will matter more than you expect when you get into disassembly.
Where to Find Project Cars
|
Source |
Strengths |
Watch Out For |
|
Online platforms (Hemmings, BaT) |
Detailed listings, plenty of photos |
Must verify in person, shipping costs add up |
|
Local private sellers |
Negotiable, inspectable |
Variable disclosure quality |
|
Car shows / swap meets |
Direct seller access, community knowledge |
Prices often already reflect enthusiasm |
|
Salvage yards |
Low cost for parts or project cars |
Requires strong evaluation skills |
Step 3 – Disassembly and Documentation
The quality of your disassembly determines how difficult your reassembly will be. This is not the place to move fast.
Tools You Need Before You Start
Get these in place before the first bolt comes off: a hydraulic lift or jack stands (non-negotiable for safety); a full hand tool set with wrenches, screwdrivers, and sockets; an engine hoist; an impact gun; a sander and air compressor; welding equipment if frame repair is in scope.

Disassembly Order and Documentation
1. Shoot a full 360-degree photo pass of the whole car, with detailed shots of the engine bay, undercarriage, and interior.
2. Remove exterior panels first — doors, hood, trunk lid — and label everything before it goes on the shelf.
3. Drain all fluids before going further: oil, coolant, brake fluid, fuel.
4. Pull the engine and transmission with the engine hoist. Photograph every line connection and hose routing before anything gets disconnected.
5. Remove interior, wiring harness, and suspension components. Bag every part and label it with a number tied to its location.
6. Build a parts tracking spreadsheet. Log each component's condition, where it came from, and what you plan to do with it.
Sloppy disassembly does not save time. It just creates problems for reassembly that you will spend far more time solving later. We have seen too many projects stall out because someone thought they would remember where everything went.
Step 4 – Frame and Structural Repairs
If the structure is not solid, everything you build on top of it is fragile. Address this before any cosmetic work begins.
Frame Inspection and Rust Treatment
Clean the chassis thoroughly, then inspect the frame rails, crossmembers, and suspension towers under good lighting. Rust falls into three categories: surface rust responds to grinding and sandblasting; flaking rust needs a phosphoric acid converter to chemically neutralize it; through-rust means cutting out the metal and welding in new plate.
Media blasting is the most effective treatment for deep rust. It brings the metal surface down to clean bare steel, giving primer the best possible foundation to bond to. Once blasting is done, spray an epoxy primer immediately to prevent flash rust.
Structural Welding
Floor pans, rockers, and wheel wells are the most common metal replacement areas on classic muscle cars. MIG welding is the standard method here, and weld quality directly affects chassis rigidity. If you do not have welding experience, this stage belongs in a professional shop. After welding is complete, coat the entire underside with a proper chassis sealer.
Step 5 – Bodywork and Panel Restoration
What happens under the paint determines what the paint looks like. There are no shortcuts here.
Finding Highs and Lows
Professional shops use a guide coat technique: spray a thin layer of black powder over the panel, then sand it. Low spots hold the black; high spots clear quickly. That contrast tells you exactly where the metal still needs work. Use a long board sander to read the panel, and sheet metal tools — slapping hammers, body dollies, shrinking discs — to correct the metal itself before filler ever gets involved.
Body Filler and Final Block Sanding
Keep body filler application under 3mm. If you need more than that anywhere, the metal underneath has not been fixed properly. Filler's job is to level minor surface irregularities, not fill structural voids. Sand from 80-grit to 320-grit in sequence, checking flatness between every pass.
Body Modifications: Worth It or Not?
For Restomod builds, hood scoops, front and rear spoilers, and flared fenders all have well-developed aftermarket options. Every modification you add to the body increases paint complexity and affects the car's future value. Keeping the original body lines intact while upgrading the mechanicals is a position the collector market tends to reward.
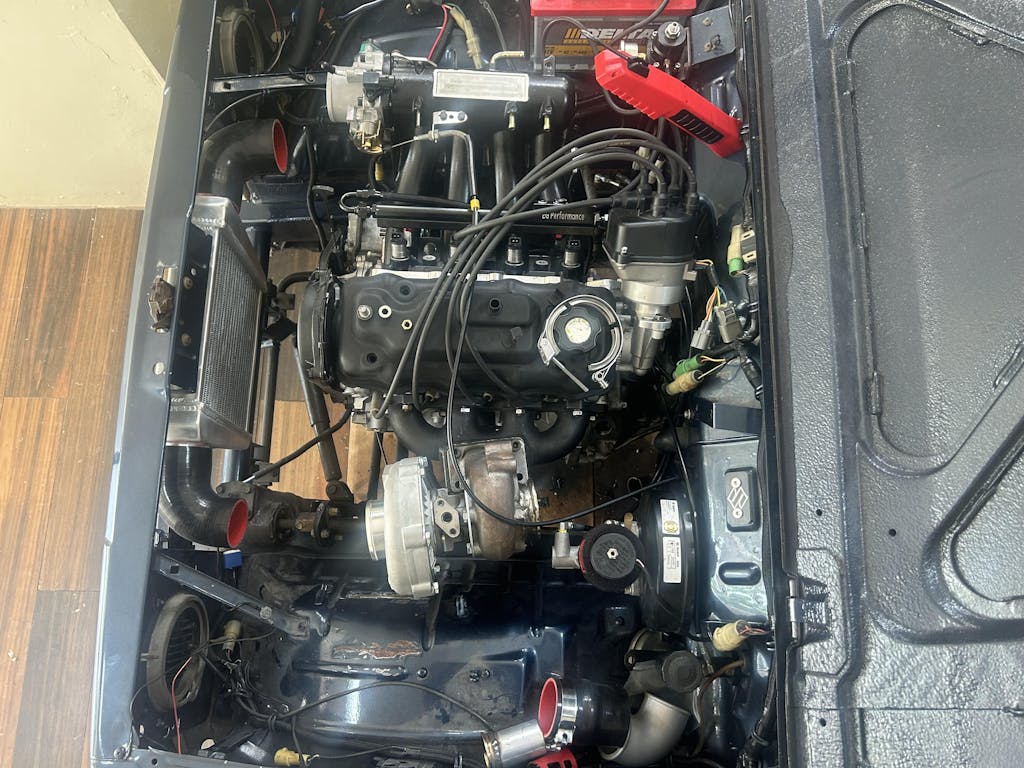
Step 6 – Engine Rebuild and Mechanical Restoration
The engine is the soul of a muscle car. This stage sets the ceiling on everything the car can do.
Take your time here. Clean workbench, good lighting, no rushing.
Engine Teardown and Inspection
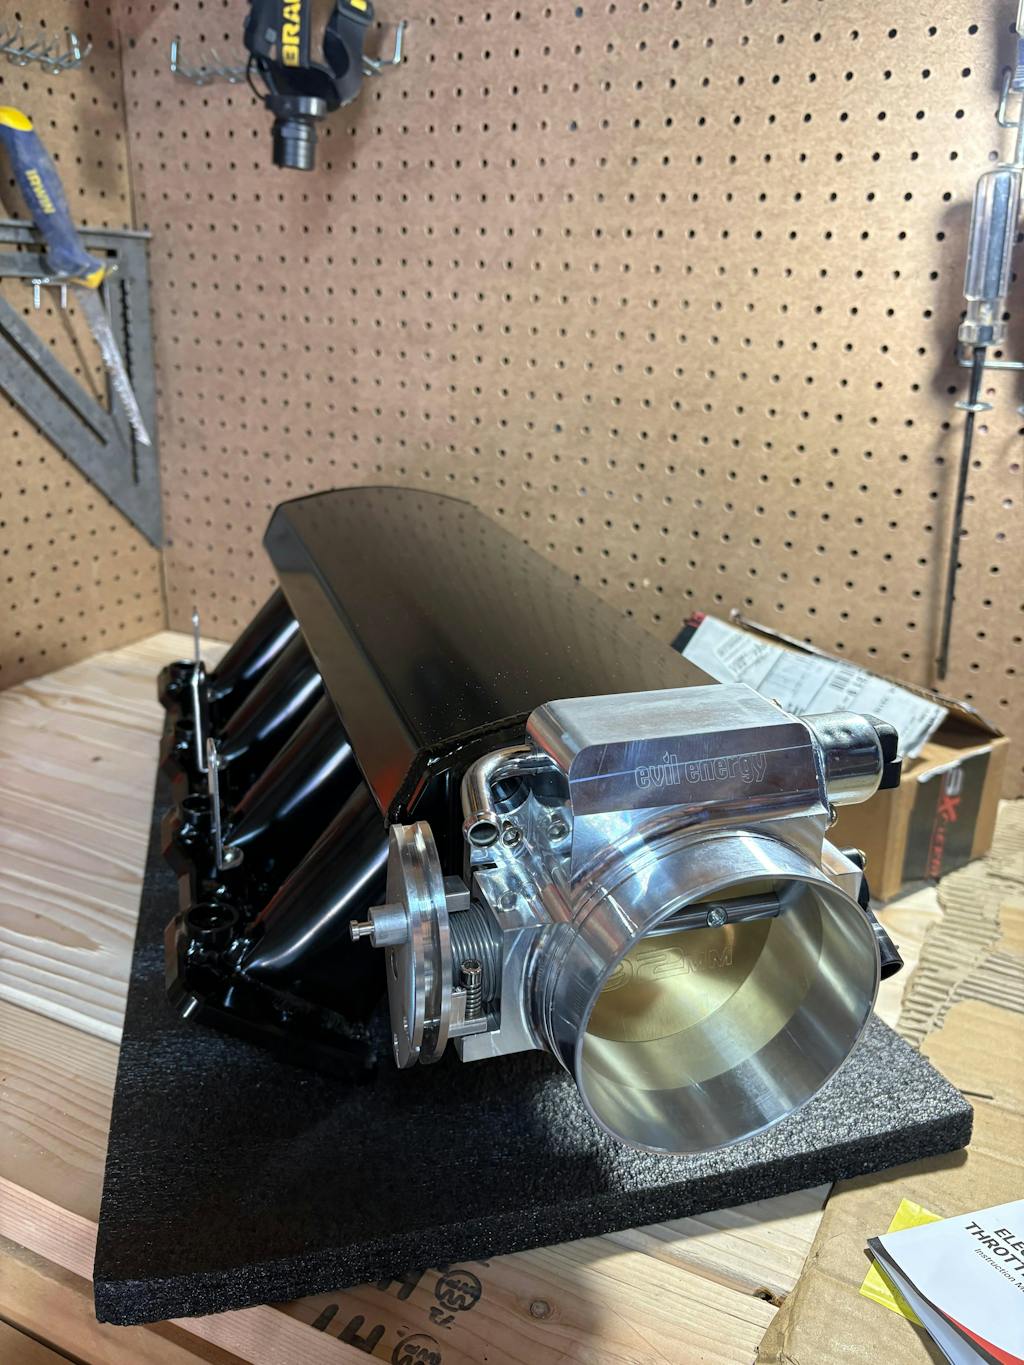
Mount the engine on a stand and work through it systematically: accessories first, then intake manifold and heads, then the bottom end. As you pull the original components off, it is the perfect time to evaluate the engine's breathing capabilities and decide what intake upgrade you should do first before planning the reassembly. Photograph every connection point and timing mark as you go. Key measurements after teardown: cylinder wall wear using a bore gauge to check for out-of-round, crankshaft journal diameter against factory spec, and piston-to-wall clearance. Anything outside factory tolerance needs machine work or replacement. Most original V8s in classic muscle cars start showing meaningful wear past 60,000 miles. Getting these numbers right is what determines how long the rebuild lasts.

Parts Strategy: OEM vs. Performance
If collector value is the priority, NOS (New Old Stock) parts or high-quality OEM-spec reproductions are the right call. Performance parts — forged pistons, aggressive camshafts, upgraded valve springs — add horsepower, but in a factory-correct restoration they directly lower the car's rating in concours judging.
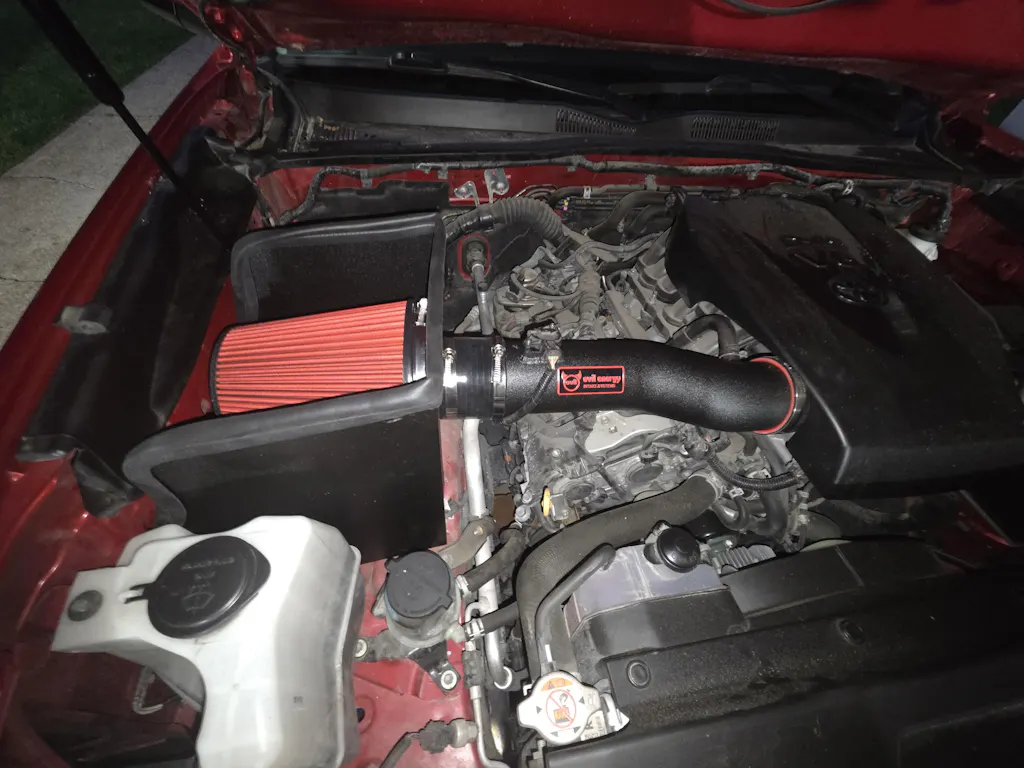
Restomod logic runs differently. The LS family of engines is currently the most popular swap choice for classic muscle car projects. According to Gauge Magazine's live coverage from SEMA 2025, LS, LT, Gen-III Hemi, and Coyote swaps continue to explode in popularity, with both professional builders and private hobbyists treating the pairing of vintage bodies with modern drivetrains as the clear direction of the hobby.
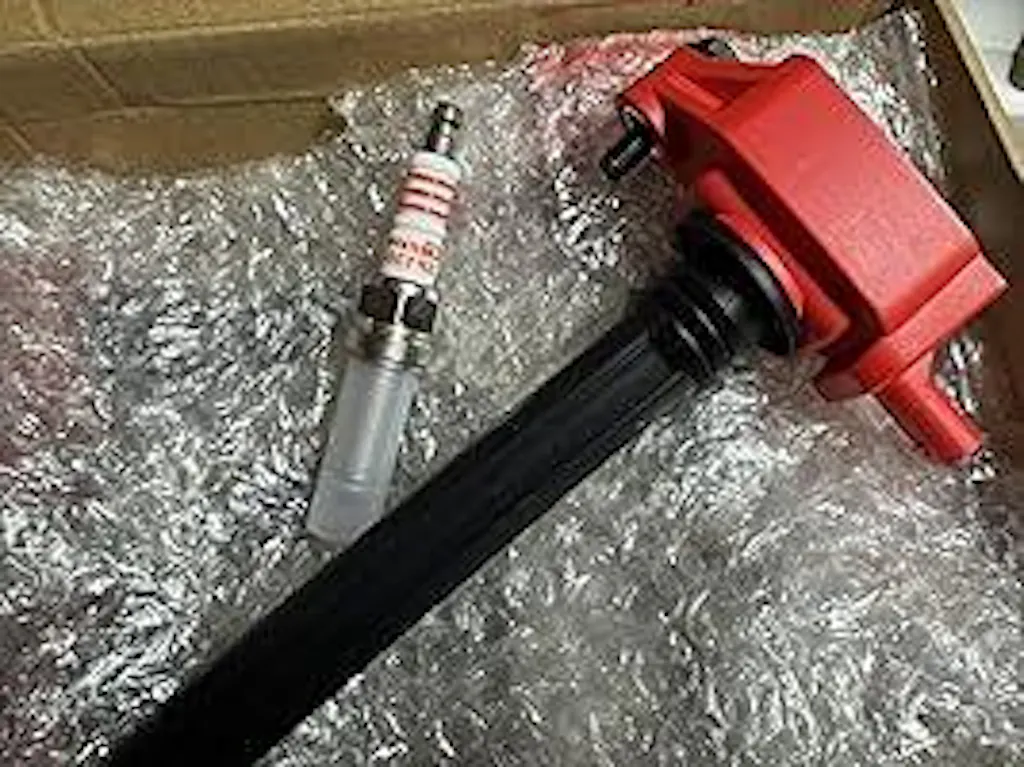
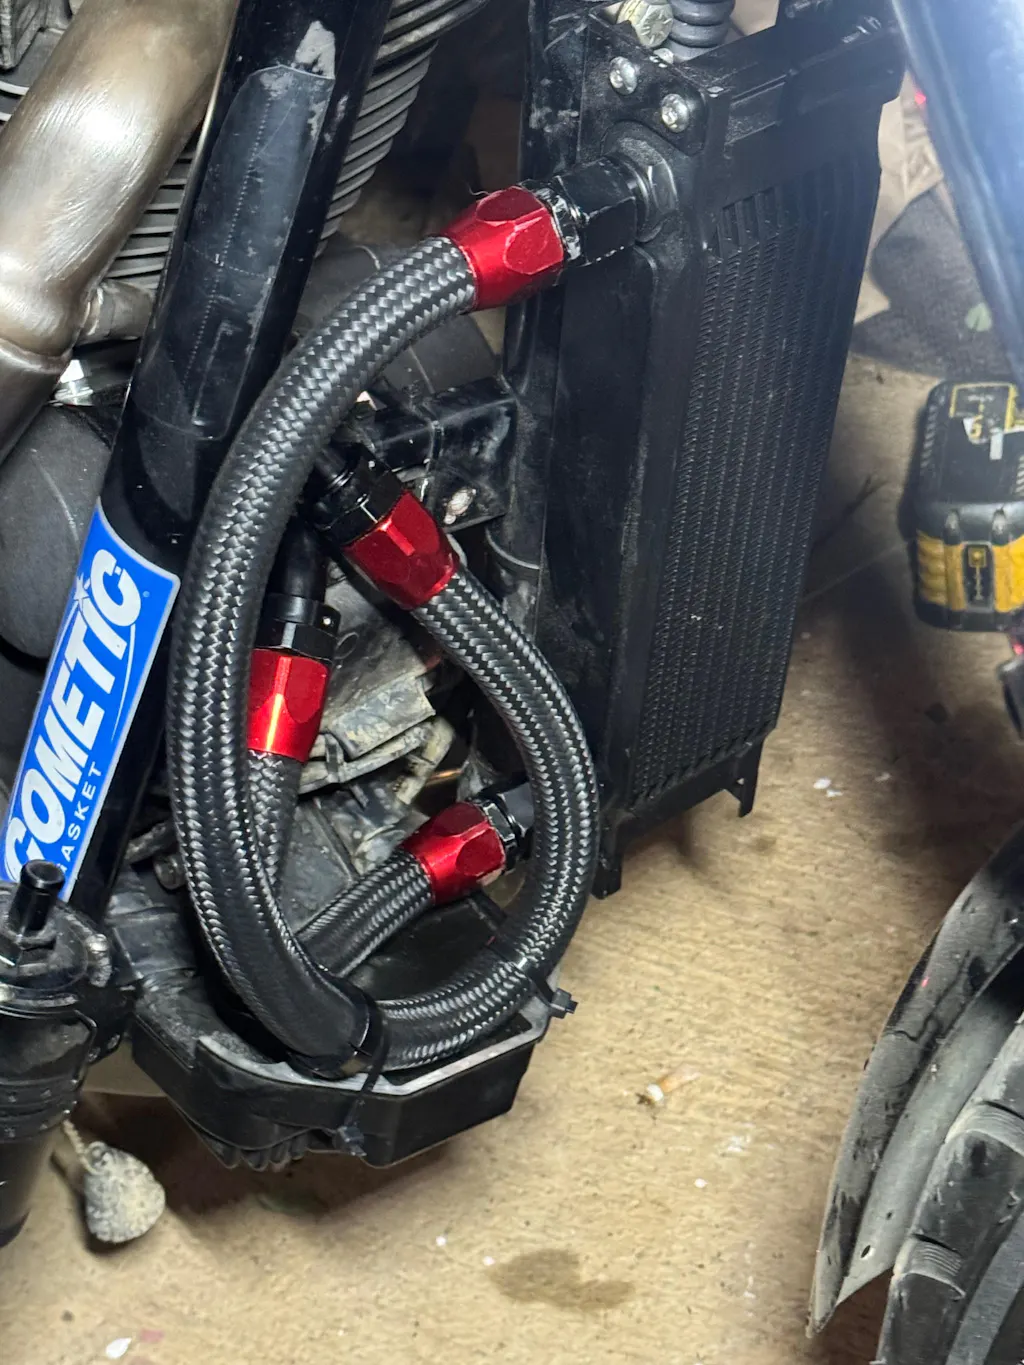
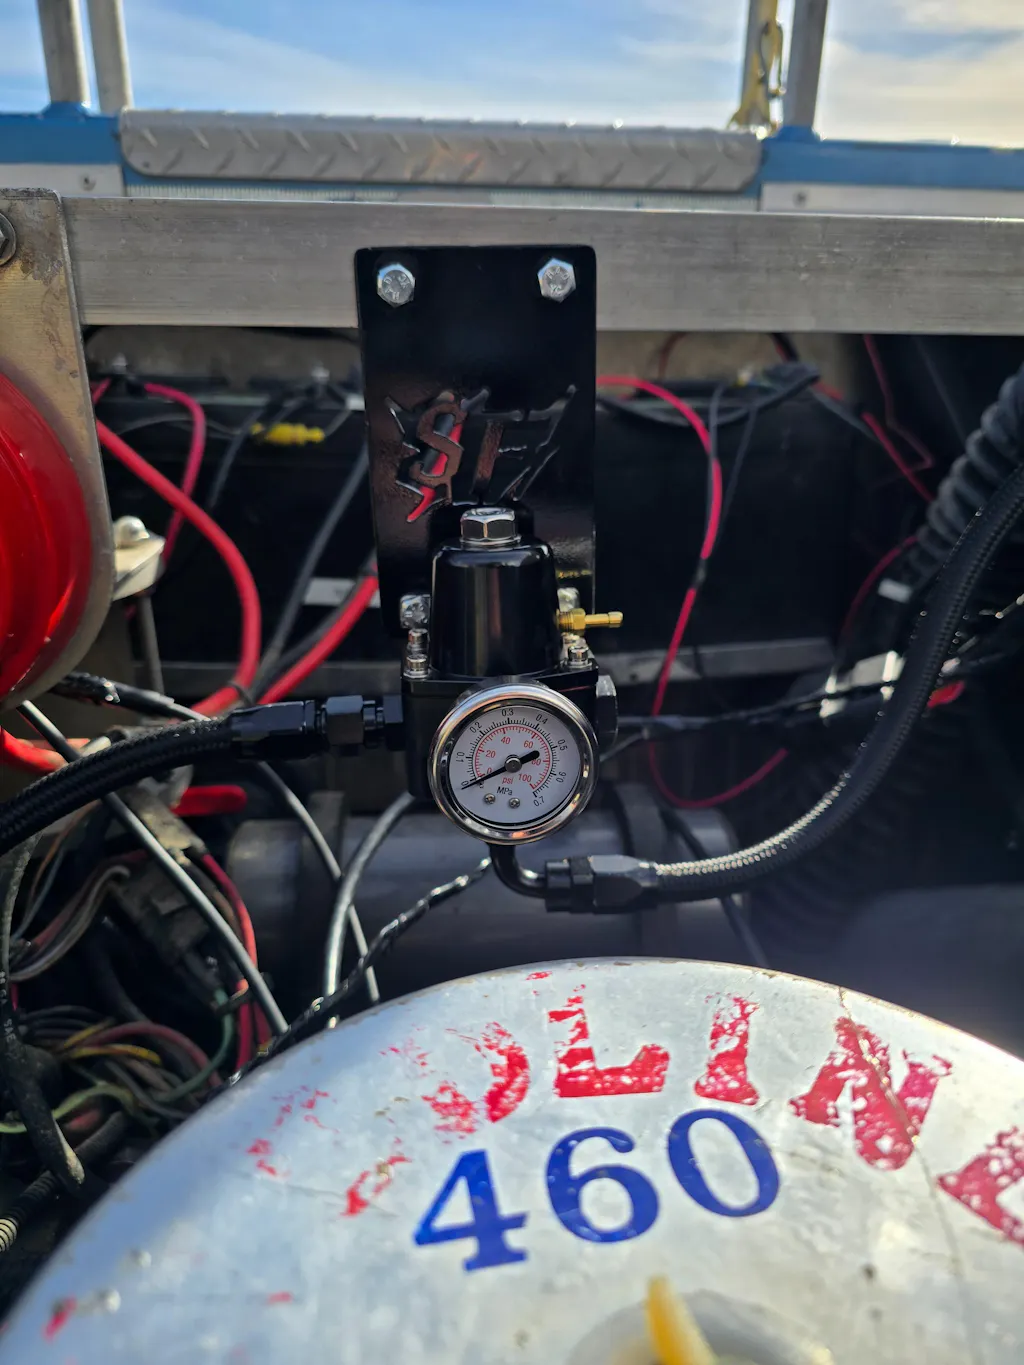
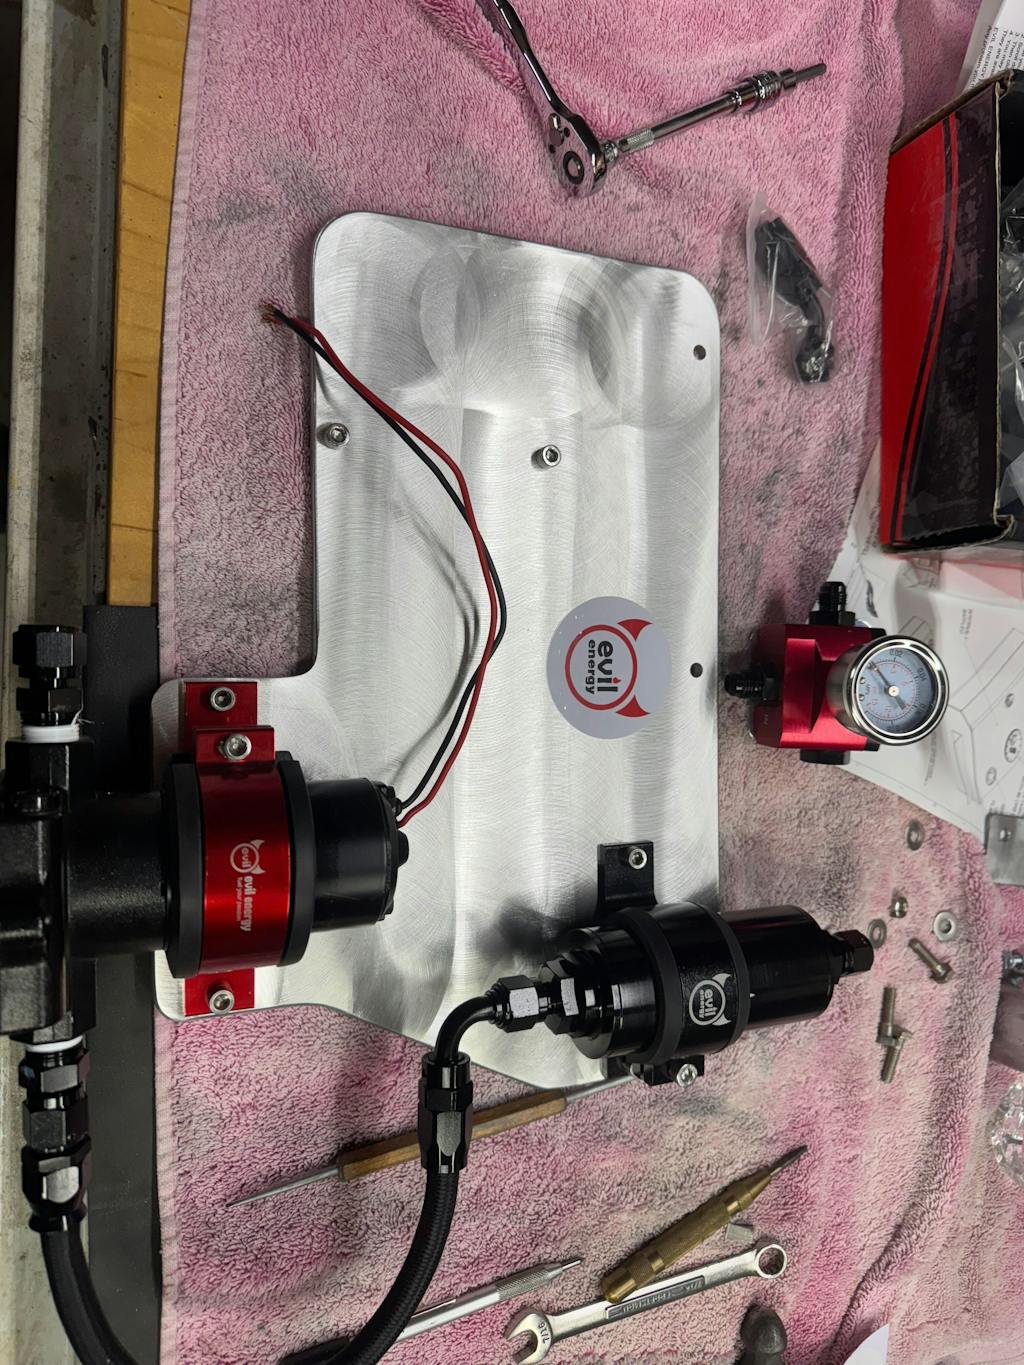
For any LS swap project, the fuel system has to be upgraded at the same time. An LS EFI system needs a stable 58 PSI fuel pressure and consistent flow that no original carbureted fuel setup can provide. Whether you are modifying the factory tank or trying to figure out what size racing fuel cell do I need for a track-focused build, proper fuel delivery is non-negotiable. Our LS Swap Fuel System Complete Kit packages a 6AN PTFE fuel line, a 20–120 PSI adjustable fuel pressure regulator, a 300LPH external electric fuel pump, and a fuel filter into one complete solution built specifically for LS swaps. It eliminates the compatibility guesswork that comes with sourcing each component separately, and it supports E85, gasoline, and diesel.
Suspension and Brakes
Original muscle car suspension geometry was engineered to 1960s and 1970s standards. After decades, rubber bushings have hardened and deteriorated, which affects steering feel and handling consistency. Replacing them with polyurethane bushings is a straightforward upgrade, and depending on your build goals, coilover conversion or adjustable shocks may be worth considering.
Upgrading from drum brakes to four-wheel disc is standard practice on almost every Restomod build. This is not purely about performance — it is about matching your braking capability to the power output. A rebuilt high-displacement V8 paired with original drum hardware is a real safety concern under hard braking.
Electrical System
Cloth-wrapped wiring from the 1960s and 70s has had 40 to 50 years to become brittle and cracked. In a hot engine bay, this is a fire risk. The most efficient window to replace the main harness is during the engine rebuild, when everything is already apart. If you are adding an EFI system, modern gauges, or an upgraded audio setup, a dedicated EFI wiring harness is the cleaner path.
Step 7 – Paint Preparation and Application
Paint is the first thing everyone sees. It is also the most honest indicator of how thorough your prep work was.
The Logic of Proper Surface Prep
Good paint starts long before a spray gun enters the picture. After bare metal work is done: shoot a coat of epoxy primer to seal the surface, skim on polyester primer surfacer to address fine imperfections, and block sand to 320–400 grit with wet paper until the surface is as close to flat as glass.
Guide coat applies here too. Spray a thin powder guide coat, then block sand again. Any low spots that still need work will hold black. Keep going until the guide coat is completely gone. That is when you are actually ready for color.
DIY vs. Professional Paint: The Realistic Breakdown
|
Approach |
Cost Range |
Best Fit |
|
DIY |
$500 – $2,000 (equipment + materials) |
Experienced painter with a spray booth and time to block sand |
|
Mid-range shop |
$3,000 – $8,000 |
Daily driver quality / weekend show car |
|
High-end shop |
$10,000 – $20,000+ |
Show car / concours competition level |
After color, lay down a minimum of three coats of clear. Once it has fully cured, color sand with 1500 and 2000 grit, then compound and polish. That is what gets you to the deep gloss that shows up in photos and under show lights.

Step 8 – Interior Restoration
The interior is where the driver actually lives. Get it right and the car feels complete. Get it wrong and it undermines everything else you spent money on.
For seat re-upholstery, source materials that match the original factory fabric pattern, texture, and color code. Most mainstream muscle car platforms have specialty suppliers that offer complete OEM-spec interior kits covering seat skins, door panels, carpet sets, and dash pads. Luxury upgrades like custom leather or embroidered headrests look expensive, but they break the car's emotional tone and will cost you points in factory-correct judging categories.
Dashboard and Gauge Restoration
Rubber dash components crack and powder after decades of heat cycling. Professional dash restoration services use vacuum-formed re-skinning techniques to bring the surface back to new-car appearance. Individual gauges — tach, speedo, oil pressure — can be restored separately to correct their original scale fonts and needle colors.
If modern gauges or a digital display cluster are part of the plan, route the wiring and plan the mounting before the dash goes back in. Retrofitting after the fact means tearing it apart again.
Sound Deadening
This step gets skipped more than it should. Adding sound deadening material to the floor, door skins, and firewall makes a measurable difference in cabin noise levels at road speed. For Restomod builds where daily drivability is part of the goal, this is close to mandatory.
Step 9 – Final Assembly and Testing
Everything goes back together here. This is where the quality of your earlier documentation either pays off or comes back to haunt you.
Reassemble in reverse disassembly order, checking each system against your reference photos before moving on. Once the engine is back in the car, do a full static check: verify all line connections for fuel, coolant, and vacuum; set initial ignition timing with a timing light; start the engine and immediately check for oil leaks, coolant leaks, and anything that sounds wrong.
Let the engine reach full operating temperature, then take it out for a first drive. Stage the test drive in phases — start at low speed and light load, confirm that brakes, steering, and electrical systems all respond correctly, then work up gradually. After every drive session, go back and check all fittings and seals for seepage.
Plan for a gentle break-in period over the first 500 miles on a freshly rebuilt engine. Getting after it immediately after a rebuild defeats a lot of the work you just put into proper clearances.

Common Muscle Car Restoration Mistakes to Avoid
These lessons came from real projects. Almost every one of them cost someone actual money.
1. No budget buffer — We mentioned this before, but it is worth repeating because it is where projects fall apart. There is no such thing as a fixed budget in muscle car restoration. Unexpected deep rust, backordered parts, machine work that has to be redone — budget 25 to 30 percent over your estimate as a baseline, not a cushion.
2. Skipping documentation during teardown — "I'll remember where it goes" is one of the most expensive assumptions in this hobby. No photos, no labels. Dozens of hours of guesswork during reassembly.
3. Buying parts too early — Stocking up at the start feels productive, but it locks up cash you may need later, and some parts you pre-order will not fit your actual build when you get there.
4. Overestimating your DIY range — Knowing where to stop is one of the most valuable skills in a restoration project. Machine work, professional paint, and frame straightening done by the right shop cost less than doing it yourself, getting it wrong, and paying twice.
5. Ignoring frame rust — Doing cosmetic work over structural problems is the most dangerous shortcut in the project. Rust continues spreading underneath the body until it shows up on the road.
6. Using low-quality counterfeit parts — The aftermarket is full of parts that look right but are not built right. Fuel systems and braking systems are not where you cut corners on cost.
7. No phase milestones — Projects with no deadlines tend to stall at the hard parts. Break the overall project into defined phases with targets attached, and the whole thing stays moving.
Is Restoring a Muscle Car Worth It?
That depends a lot on how you define worth it.
From a market standpoint, Future Market Insights projects that muscle car restoration will account for 31.4% of the global classic car restoration services market by 2026 — the largest share of any vehicle type — driven by parts availability and sustained collector demand. Well-restored examples of mainstream models hold their value and often gain it. A clean 1969 Camaro Z28 or a 1970 Plymouth 'Cuda in documented, correct condition can return far more than what the restoration cost.
From a driving standpoint, a fully finished muscle car restoration delivers something no modern production car can replicate: the feel of the machinery, the weight, the exhaust note, and the specific satisfaction of knowing you pulled it back from nothing yourself.
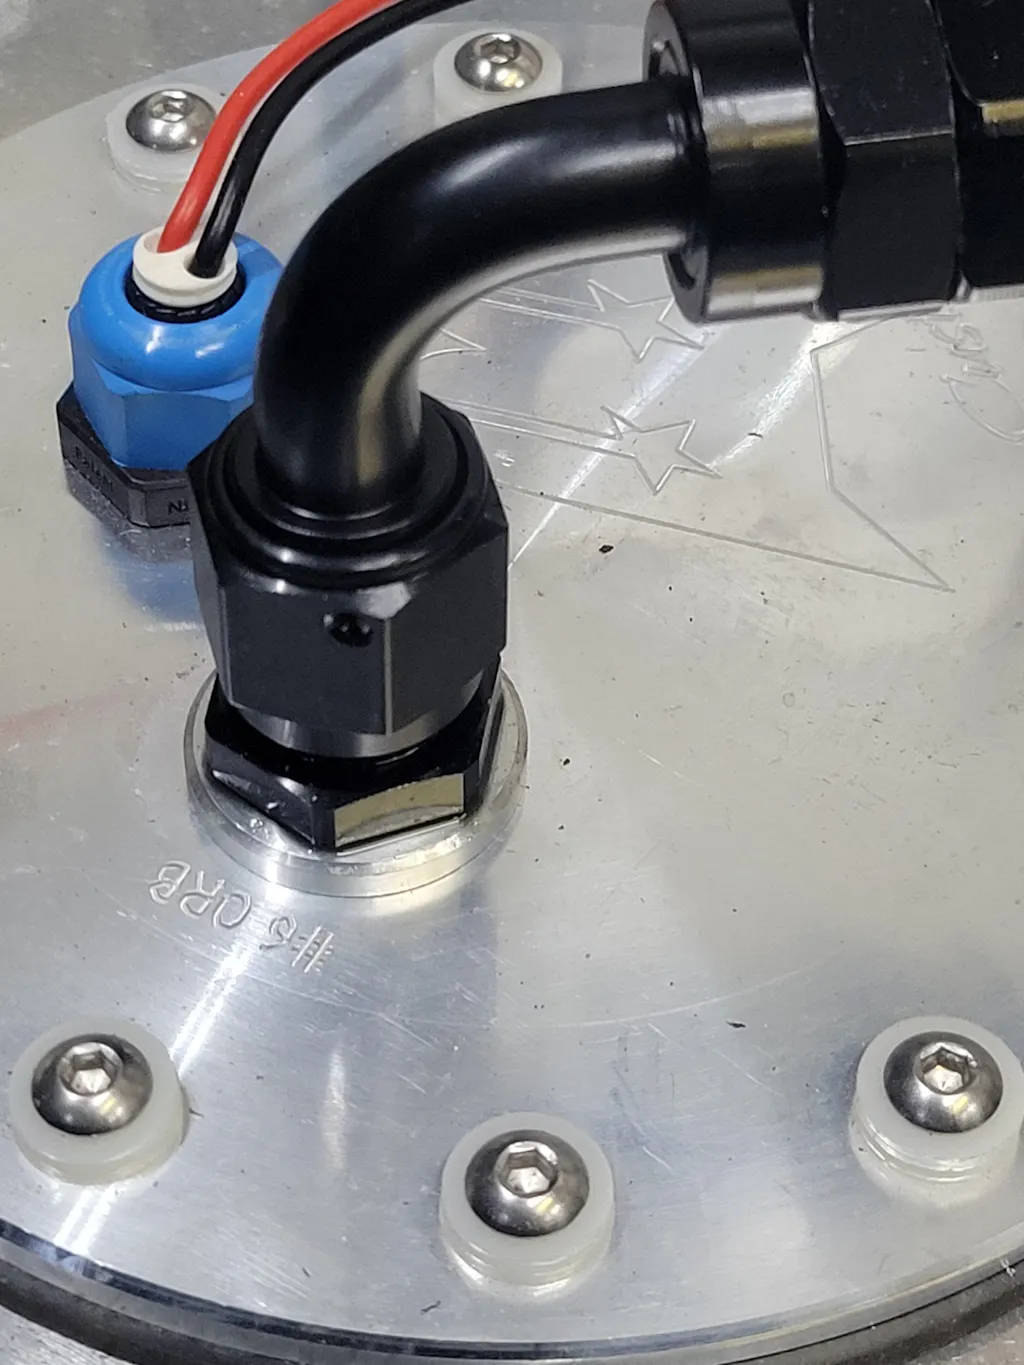
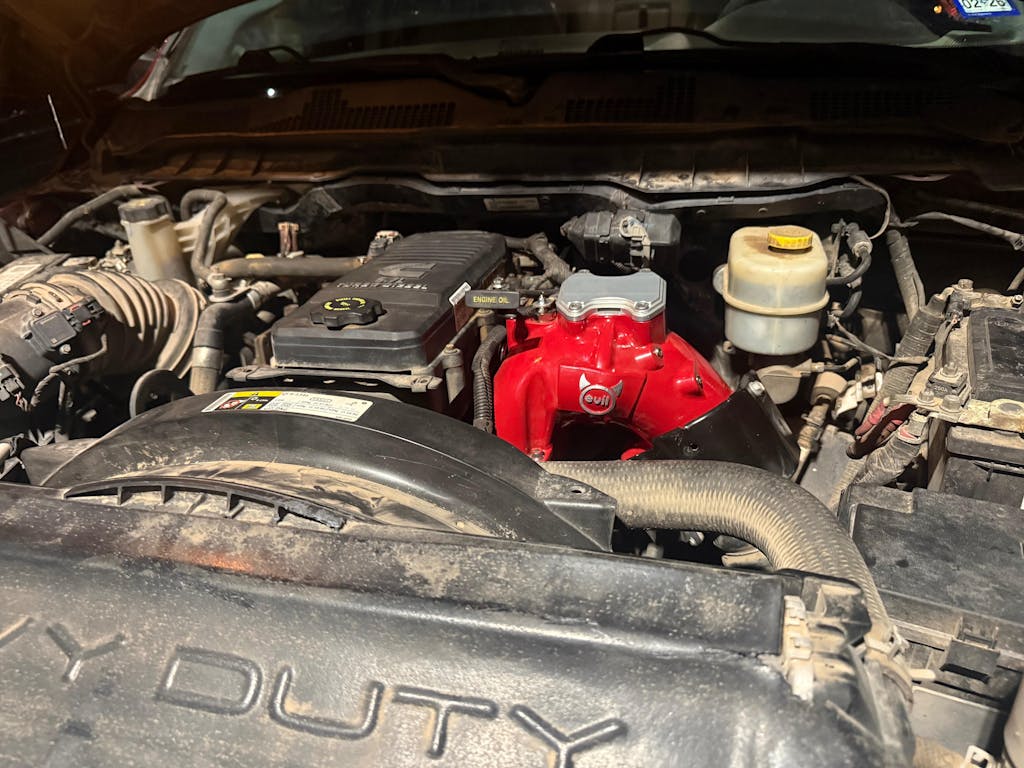
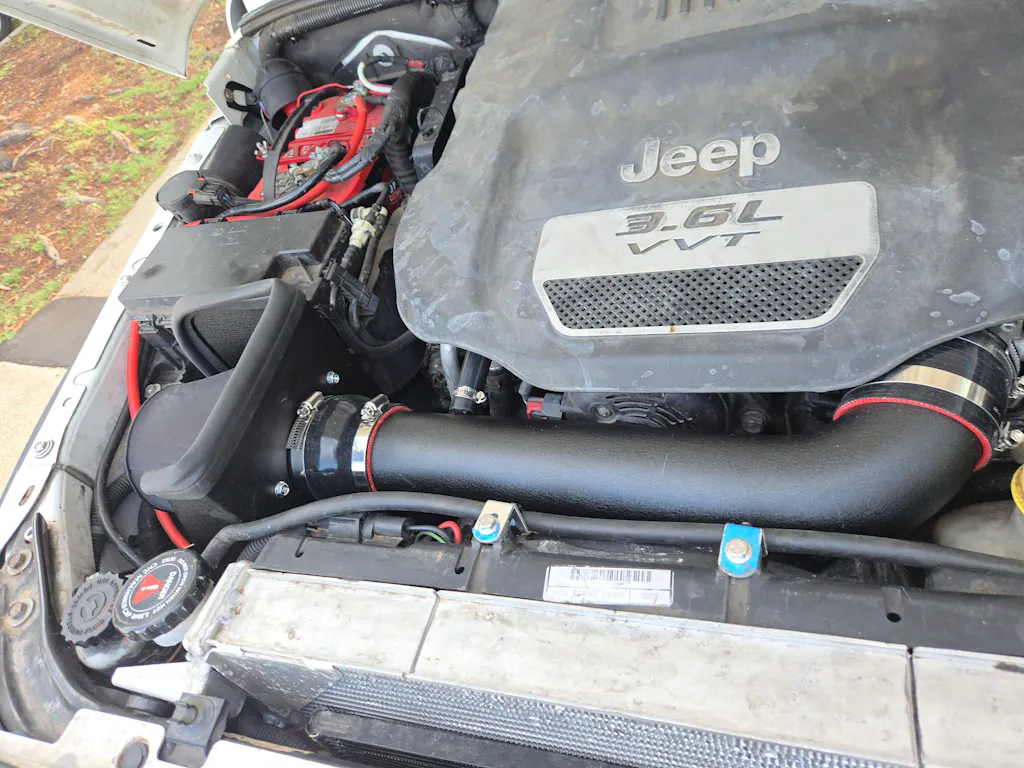
On the maintenance side, fuel system upkeep is the area most owners underestimate once the build is complete. An upgraded EFI system needs clean, stable fuel delivery. Replacing the fuel filter on a regular schedule is the lowest-cost way to protect pump longevity and keep the system running right. Our EVIL ENERGY Inline Fuel Filter is available in 10, 30, 40, and 100 micron filtration ratings with 6AN, 8AN, and 10AN inlet options, and it comes with a mounting bracket. It fits the majority of EFI and carbureted fuel systems. For anyone who just finished an LS swap or a complete fuel system overhaul, it is the right way to finish the job.
Start Your Muscle Car Restoration Now
Restoring a muscle car takes planning, patience, and the right parts at the right stages. Every phase has its own challenges and its own rewards. Here is a quick recap of the full 10-step process:
01
Plan and budget
Set goals. Pad estimate by 25%.
02
Source your project car
Inspect rust. Negotiate hard.
03
Disassemble and document
Photo every part. Label everything.
04
Frame and structural repair
Blast, weld, seal first.
05
Body and sheet metal
Guide coat. Block sand. No shortcuts.
06
Engine rebuild
Measure tolerances. Torque to spec.
07
Paint
Epoxy primer. 3 clear coats. Polish.
08
Interior restoration
Match original codes. Add deadening.
09
Final assembly and testing
Reverse teardown. Stage first drive.
10
Avoid common mistakes
No buffer kills projects. Don't skip docs.
For everything related to fuel system components, we carry a full line covering external electric fuel pumps, PTFE fuel lines, pressure regulators, and complete LS swap fuel kits. Everything is compatible with E85, gasoline, and diesel. Browse by project type in our Fuel System Kits collection.
Tags: