![[CPE]](http://www.ievilenergy.com/cdn/shop/files/EVIL-ENERGY-Fuel-Cell-Tank-Kit-Efficient-Fuel-System-Solutions-5-10-15-Gallon-EVIL-ENERGY-141125247_940x.jpg?v=1766341579)
![[PTFE]](http://www.ievilenergy.com/cdn/shop/files/EVIL-ENERGY-Fuel-Cell-Tank-Kit-Efficient-Fuel-System-Solutions-5-10-15-Gallon-EVIL-ENERGY-141125321_940x.jpg?v=1766341592)
![[PTFE]](http://www.ievilenergy.com/cdn/shop/files/EVIL-ENERGY-LS-Swap-Fuel-Kit-_-Fuel-Filter_6AN-20FT-Fuel-Hose-_20-120PSI-Regulator-_-300LPH-High-Flow-Fuel-Pump-For-LS-Swap-EFI-Systems-and-More-_Copy_-EVIL-ENERGY-139826361_940x.jpg?v=1767074132)
![[CPE]](http://www.ievilenergy.com/cdn/shop/files/EVIL-ENERGY-LS-Swap-Fuel-Kit-_-Fuel-Filter_6AN-20FT-Fuel-Hose-_20-120PSI-Regulator-_-300LPH-High-Flow-Fuel-Pump-For-LS-Swap-EFI-Systems-and-More-_Copy_-EVIL-ENERGY-139826246_940x.jpg?v=1767074132)

Evil Energy’s Exhaust Clamp And Cutout: Level Up Your Modifications
🎁 A Personal Gift For My Readers
To support your project, I've secured an exclusive 8% OFF for you.
Simply paste the code at checkout.
💡 Use the savings to grab your extra fittings, oil lines, or connectors for free!
Evil Energy’s Exhaust Clamp And Cutout: Level Up Your Modifications

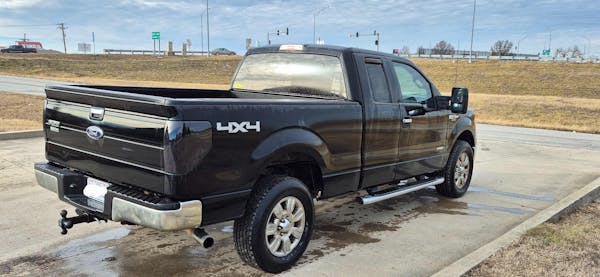
It is common for vehicle owners to make aftermarket modifications to their cars and trucks. For modern vehicles, it may seem to be a Saturday afternoon task. But for others, you may need a dual exhaust kit, bulk exhaust tubing, your favorite pair of mufflers, or even an exhaust cutout to give your vehicle a split identity. To fix everything together, you will need the 2 inch exhaust clamps.
What Is An Exhaust Clamp?
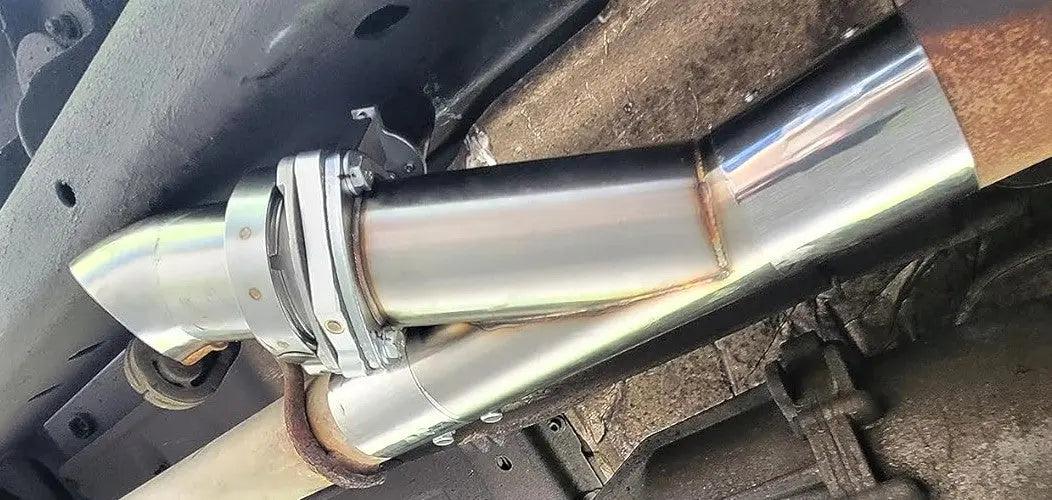
A 2 inch exhaust clamp is a device that holds together and fastens securely different components of the engine that need to be connected. This is done to prevent movement and separation caused by inward pressure from the working of the engine. Its main automotive use is to secure the exhaust to the vehicle without welding.
A good-quality clamp will result in a high-performing engine as it will secure tightly the parts and prevent any air leaks. Air flow leak results in power loss which will cause the vehicle to perform below par. Additionally, its design allows even distribution of pressure across the joint, preventing it from slipping and shifting.
What Are The Different Types Of Exhaust?
After choosing the right diameter that best fits, the next step is to choose the right type that meets your needs. Three of the commonly used styles are listed below:
-
Saddle Clamp: It is also known as U-bolt clamp. This low-cost device allows an extremely solid leak-free clamping by causing deformity to the tube connection. However, for this reason, it cannot be easily removed.
-
Narrow Band Clamp: Its function is reserved for stainless steel slip-fit connections with slot cuts. This gives a uniform clamping pressure along the joint. While costly, it allows easy disassembly and reusability.
- Tube Band Clamp: It is a thin, tube clamp that adheres to the pipe. This conformity with pipe allows sealing without the need for slot cuts. However, it creates a memory. Memory can cause pipe leaks while also making it difficult to place the clamp in the exact same location again. It is the most costly out of the three.
Pro-Tips for Installation of Exhaust Clamps

U-bolt exhaust clamps are easy to install. We must first see if we are installing them in the right spot to seal the exhaust leak. Next, place the U-bolt over the exhaust joint. Ensure that it fits properly or it may damage the joint. Tighten them evenly since uneven pressure can also cause damage. Finally, secure the clamp firmly and check that there are no leaks.
Installing a 2 inch exhaust band clamp is also similar. The difference is in the design. 2 inch exhaust band clamps don’t have nuts and bolts. Instead, we start by placing the clamp in line with the pipe. Gradually and uniformly tighten the clamp and compress the joint. This will create a seal.
Exhaust Cutouts – What Are They and Why You May Want Them?
2.5 exhaust cutouts are the aftermarket accessories that give the driver control over the exhaust flow and therefore, control over the sound generated from their vehicle as a result. It provides the flexibility of driving the car quietly down the street or choosing to tune in a sporty mood on the tracks. Being electrically operated, all it takes is one push of a button to uncap its opening and enjoy the loud sounds while shattering eardrums.

The mechanism behind this is very simple. A 2.5 exhaust cutout is an open passage located between the headers and mufflers in the exhaust system. Normally, the opening is capped. So, all the exhaust flow is directed toward the mufflers and out of the tailpipes. However, when uncapped, a major portion of exhaust noise is channeled through a Y-shaped pipe which then escapes out into the atmosphere. This bypasses the mufflers entirely.
Easy Way for the Installation of Electronic Cutouts
With the clamps and slip fittings, there is no need to weld anything. The installation takes about three hours, the steps of which are given below:
- Locate a spot in the exhaust where the apparatus can easily be fixed.
- Cut a section out of the current exhaust and place a Y-pipe in its place.
- Attach the electric motor and flapper valve to it with a three-bolt flange. Make minor adjustments to the valve if required.
- Finish assembling the cutout with a pair of turndowns.
- Connect the electric motor to a control module, and the control module with a source of power.
- Activate cutouts using a wireless key fob. Push the button and uncork the exhaust as you wish.
Can They Fail?
Exhaust Clamps generally don’t break. Though rarely, they may fracture during removal. This is why, keeping a few spare clamps during removal is an extra precaution that can prove beneficial. However, clamps used in trucks can loosen with time. Be careful of the trouble that comes with it since it can rub against the pipe and form a groove. Lastly, if the clamps don’t fit, how will the exhaust cutouts be in place, right? Thus, a loosened exhaust can damage the entire system. Therefore, it is advisable to conduct routine checks on all the clamps.